Minnows aren’t necessarily cheap, and they may not always be easy to come by. I have had good success keeping my minnows alive at home for extended periods, and it’s pretty easy!
First, let’s get a little background information out of the way so we’re all on the page.
What kind of minnows are used for fishing?
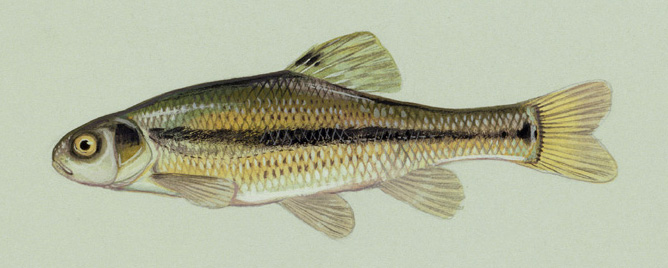
In my neck of the woods, most of the baitfish that are readily available are the common, fathead minnow. Bait shops in other regions may stock other varieties ( such as shiners and chubs ) but most of my experience is with fatheads, so I’ll be writing from that perspective. Of course, much of the information should apply to most species of baitfish.

Minnows are a great baitfish for many species, including crappie, walleye, even catfish and bass. Not that I do much bass fishing with minnows… but I do catch a few bass while crappie fishing.
Why Keep Minnows At Home?

I suppose there are a number of reasons you might want to keep minnows alive and healthy at your house. The biggest reason for me is convenience.
I live out in the sticks aways, so It’s not always easy or convenient to get in to town on a dedicated minnow run. I like to purchase enough minnows at one time to last me a couple of weeks.
I don’t want lack of bait to keep me from doing some fishing, especially during those times of year when live minnows seem to be the best bait for crappies.
This makes it important to pay attention to the health of my minnows, so they can live to die another day (hopefully in the mouth of a nice crappie).
Over the years I’ve learned a few tricks that help me keep my minnows lively for as much as three weeks, without resorting to managing a full-blown aquarium or bait tank. Some people do use those methods, but that gets pretty involved…
I want to share my super-simple method. It works really well for me on those occasions where I’ve got leftover minnows, or I just want to keep some on-hand at the house for awhile.
How To Keep Minnows Alive At Home – (Video)
I made a video about this very topic on my YouTube channel. In this video, I explain what I do to keep minnows alive at home, but I suggest you keep reading after the video for more in-depth information.
Ok, now that you watched that video (you did watch it, right?), let’s dive in a little deeper.
There are a few key concepts to keep in mind for short- to medium-term survival. Luckily it’s all simple stuff, which I refer to as “Minnow Maintenance”.
My routine requires just a few simple items, which you may already have on hand.
| Minnow Bucket | Bubble Box | Mini Fridge |
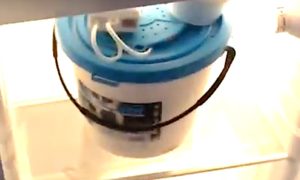
| I prefer an insulated minnow bucket with a perforated lid. The insulation helps protect against big temperature swings, and the holes in the lid help with oxygen intake when your bubbler isn’t running. | I use mine to hit the minnow bucket with some fresh oxygen every few days. Mine was very inexpensive, and has lasted through a few seasons now without issue. | I know, not everybody has a dedicated bait fridge, but you can pick one up cheap on craigslist or Amazon, and all your bait will be happier for it. |
| Check Pricing | Check Pricing | Check Pricing |
If you don’t have an insulated minnow bucket OR an aerator, you can get a deal on a combo package (bucket and aerator) from Amazon.
Minnow Maintenance Routine
Here is a very simple routine you can run through a few times per week to keep your minnows healthy. Try to follow these steps at least three times per week. The more often you do it, the longer your minnows will last.
- Take your minnow bucket out of the bait fridge
- Remove any dead minnows
- Either scoop or pour some water out of the bucket. Top it off with bottled drinking water (not chlorinated)
- Run the Bubble Box for 15 minutes or so
- Put the minnow bucket back in the fridge
Following these steps accomplishes the following:
- Keep your water cool – Minnows are sensitive to warm water, and can die quickly when overheated. I use a cheap mini-fridge for all my bait storage.
- Let them breathe – Over time, minnows will deplete the dissolved oxygen in the water. I periodically use an inexpensive “bubbler” to re-introduce oxygen into the water.
- Keep it clean – Minnows are animals, so they generate waste. This is introduced into the water in your minnow bucket. I periodically swap a portion of old water out with a bottle of drinking water.
- Remove Dead Minnows – Despite your best efforts, you’re going to lose a few minnows. Each time you do your “minnow maintenance”, remove any floaters. Decomposing dead bodies is really bad for your water, so you want to get them out quickly.
Temperature
Overheating is probably the quickest thing that will kill your minnows. We’ve all seen how quickly minnows can die in your bucket on a hot summer day.
Fatheads prefer a temperature range of 50-70F. They can tolerate warmer temps for awhile, but they are much more able to handle cooler water than warmer. I have no issues storing minnows at fridge temps, though I keep my bait fridge at its warmest setting.
The Bait Fridge
I have an inexpensive dorm-style fridge I use as a bait cooler. I set it at the warmest setting, which is around 45F last I checked. Your own fridge may differ, so it’s important to get a temp reading.
These little mini-fridges are great for storing other bait as well, like nightcrawlers, wax worms, etc. I usually keep some bottled water in there, which I use as part of my “minnow maintenance” routine.
You can generally find something usable on craigslist, or pick up a cheapo like this one from Amazon. You don’t need anything fancy, and if you fish as much as I do, you’ll really appreciate the convenience of having your own bait fridge.
In a pinch, you can find a cool place in a garage or basement, and periodically add some ice to keep the water temperature down.
Be careful about that ice though. If you used tap water to make the ice, you’ll be adding chlorine and potentially other chemicals to the water. I’ll talk more about water quality shortly, keep reading…
Oxygen
Like all fish, minnows require oxygen. Over time, minnows will consume the dissolved oxygen in the water. The warmer the water, the faster this takes place. Enter the Bubble Box…
Bubble Box Aerator
I like my Bubble Box aerator. It has a handy bucket clip, a relatively waterproof construction, and a weighted oxygen stone which helps dissolve oxygen from the air being pumped into the water.
It takes a pair of D-cell batteries, but I discovered that the unit will operate with just one battery installed. This means the pump requires just 1.5 volts to operate!
I can’t remember what I paid for mine, but I’m pretty sure it was under $10. You can check out pricing and reviews on Amazon, it’s a well-liked product.
Water Quality
Left unattended, the water in your minnow bucket will quickly become inhospitable.
Dissolved oxygen will become depleted, and the waste (like poop and pee) will lead to unhealthy living conditions.
That’s why it’s good to periodically remove some existing water from the bucket, and add some fresh water.
I do not use tap water for this, due to the presence of chlorine ( and who knows what else) present in water from the faucet.
Instead, I just pour in some cheap bottled water, which we always have plenty of at our house.
By swapping out a portion of the water at a time, I am helping to keep the water clean, but also avoiding a big temperature swing that would stress the minnows.
And by keeping some bottles of water in bait fridge with my minnows, the water is going to be pretty much at the same temperature anyway.
Conclusion
Well, there you have it. My super-simple, easy-peasy way to keep baitfish alive at home for weeks at a time.
I hope you learned something, feel free to leave a comment and share this article if you found it helpful.
Now gear up and GO FISHING!


